The AxiDraw Drawing Machine (Legacy version)
[This documentation is for the first-generation legacy-model AxiDraw, sold prior to February 2016, with white Delrin chassis. Please Click here for information about current AxiDraw models.]Software configuration
Before using the AxiDraw, various settings need to be configured in the software.
Connect the power supply to the AxiDraw, then connect the USB cable between it and the computer. If this is the first time connecting, the computer will automatically install any required drivers (Windows may display a "Found new hardware..." message).
Here's a quick video showing the connection procedure:
Setting home position and motor resolution
The WaterColorBot extensions use the top-left of the Inkscape document as the origin. Once drawing is finished, the pen is moved to a home position which, by default, is approximately 3 inches to the left of the origin. In the actual WaterColorBot, this places the pen/brush over the paint/wash area. However, this is irrelevant for the AxiDraw, so we'll need to change the settings so that the home position is at the origin. Additionally, we need to specify the motor resolution (in steps per inch), which ensures that a drawing in Inkscape is reproduced at the correct scale.
These settings are controlled by values in the configuration file, wcb_conf.py. To save having to manually change the file, a modified file suitable for use with the AxiDraw is available below. Download and save it over the original file (right-click and choose "Save link as..." or similar). On Windows systems, this is located at either C:\Program Files\Inkscape\share\extensions or C:\Program Files (x86)\Inkscape\share\extensions. Mac and Linux systems use $HOME/.config/inkscape/extensions.
- wcb_conf.py for the AxiDraw (For v1.0.0 of the extensions. File begins with "Version 0.9 (Rev A44), dated 10/5/2013".)
[For the technically minded: the two parameters which were changed are F_DPI_16X to 2036.0 and F_StartPos_X to 0.0, as shown here. If you need to edit the file, use a good text editor such as Notepad++ or Sublime Text which handle linebreaks correctly. On Windows, you may have to run as administrator.]
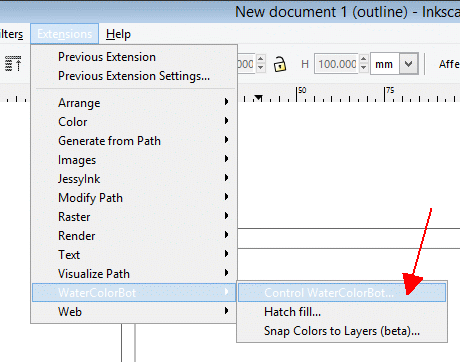
WaterColorBot extensions
Start up Inkscape. From the Extensions menu, open WaterColorBot -> Control WaterColorBot to bring up the WaterColorBot interface:
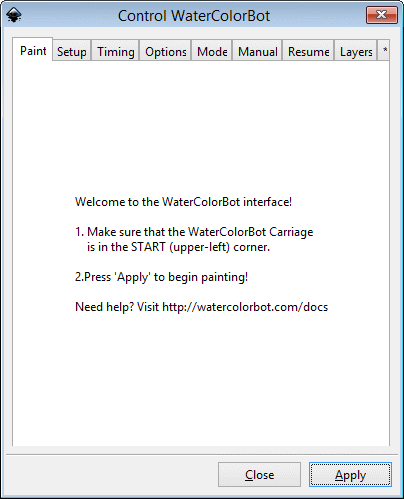
We'll now go through each tab and configure the settings.
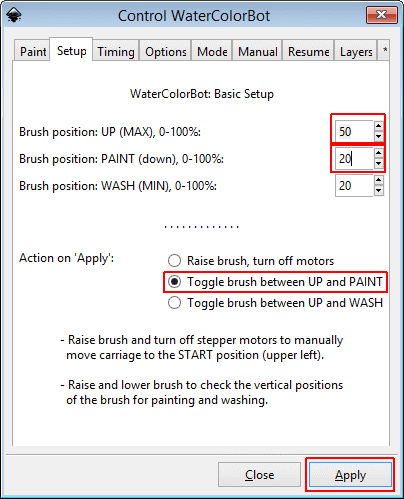
Setup tab
This tab controls the pen up/down positions. The numbers entered correspond to the servo position. As an initial guide, enter 50 for UP and 20 for DOWN (ignore WASH). Choose "Toggle brush between UP and PAINT". When you click apply, the pen slide should move up or down from one position to the other.
Here's a quick video showing the movement and the desired position of the servo arm in the up and down positions. You may need to change the values slightly to suit the particular servo used in your machine.
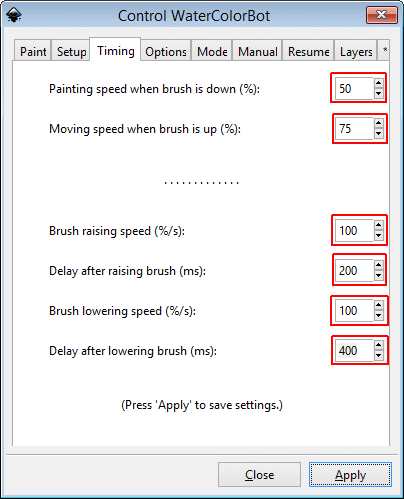
Timing tab
This tab specifies various speeds and times. Set the values to those shown below and click Apply.
The "painting" and moving speeds are specified as a percentage of the default maximum speed, which in turn is set in the wcb_conf.py file (parameter F_Speed_Scale). The default values mean that 100% corresponds to about 48mm/s movement speed. Slower speeds result in more accurate drawing with less overshoot at sharp corners.
Be careful about setting too large a "Delay after lowering brush" - too large a value will result in the pen resting on the drawing surface, possibly causing ink to bleed. Ideally, the pen should start moving immediately after it's lowered. If you experience problems with ink bleed when the pen is lowered, try decreasing this value.
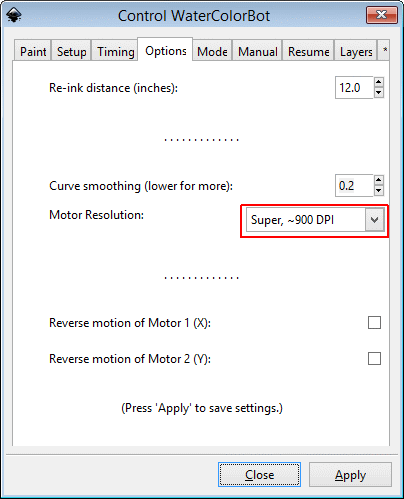
Options tab
The only value to set here is motor resolution - set it to "Super 900 DPI" and click Apply.
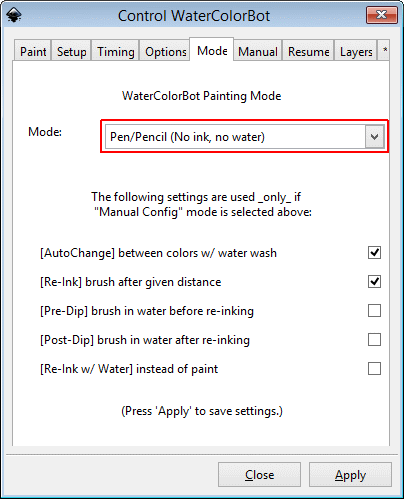
Mode tab
This controls the operating mode - since we are only performing a simple drawing action (i.e. no paint, washing cycle etc.), choose Pen/Pencil from the drop-down list and click Apply.
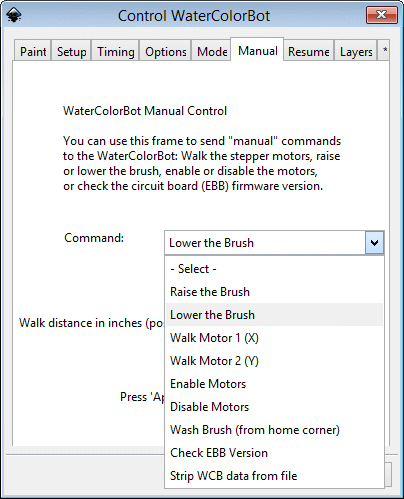
Manual tab
This tab provides several useful "manual" commands for controlling the machine. Of most use are raise/lower brush and enable/disable motors. To perform a command, select it and click Apply.
Resume and Layers tabs
The remaining two tabs are more advanced and let you pause/resume drawing & draw specified layers (useful for multicolour drawings).
That's it! You're now ready to make your first drawing.